|
See Page 1 here Pages 2 and 3 of the Art Journal are ready! Page 2 is very much inspired by the Father's Day card I've made. But that's the whole idea of my art journal isn't it? I don't know for you, but the purpose of my art journal is for me to remind me the techniques I've picked up over the years, and "see" how far I've "grown". 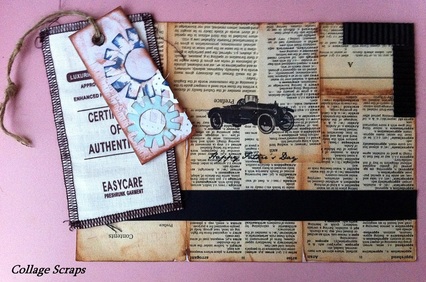 made with really simple materials. Materials: 1) Collage Scraps Aged book cardstock [in stock] 2) Collage Scraps DIY Chipboard gears (in blue) 3) Tag from dad's Sifs shirt 4) Black corrugated cardstock 5) Vintage automobile courtesy of FunkyTime (see under "freebies" for free download) 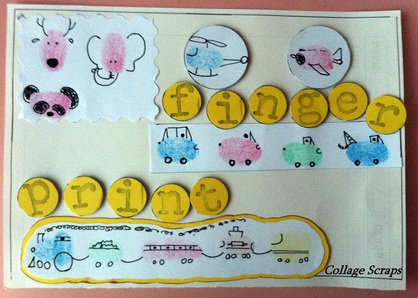 Page 3 is all about FINGER PRINTING
Drawing techniques are picked up primarily from kokokokids.ru and Faber Castell. Candy colours ink pads used are by Faber Castell! Finger printing is mad fun! Press your finger against the ink pads and stamp it on the cardstock and draw on it!
0 Comments
Part 3 of the Operation Codenamed "no-i-dont-need-a-journal-but-i-make-one-anyway" I've finally sat down and get the hands dirty... Decided on a theme while looking at the materials I have on hand. I always believe in using readily available materials. So, for this first page, i've used things found in the house, where I happen to have many vintage-related elements. It's a vintage theme alright! Paper: Japanese Marbled Cardstock, White Acid-free paper, Paper Doily, Corrugated Paper, Translucent Paper Inks: Tim Holtz Distressed Ink "Old Paper", Artnic "Apple Green" Faber Castell "Yellow", Versa "Bark" Stamp: Kaiser Script Cutting Tools: Scalloped Scissors, Regular Scissors Adhesives: Double-sided tape, Mounting tape Use your favourite vintage clipart to spruce the page!  Simply stamp around the white cardstock with Kaiser Script stamp in the inks to create a distressed aged look (See below) The pressure you used while applying the ink to the stamp determines how faded the stamped effects will turn out, so vary the pressure in applying. And I cant emphasise how important that we must remember to distress the edges of the cardstock! 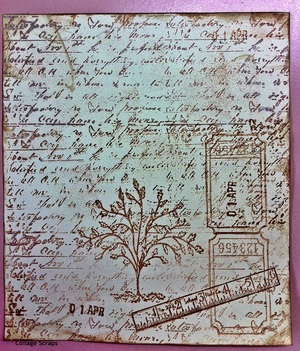 Preparing the elements: 1) Scallop the stamped cardstock with the scalloped scissors and cutting the translucent paper and the corrugated paper into strips as side border. 2) Tag and postcard are made with white cardstock in distressed inks. Images on tags and postcard are drawn on, 3) Use double-sided tape to secure them and mounting tape for the "pop-up" effect as seen with the vintage clipart. 4) Distressed look for the paper doily too. Finally, add in words or quotes on the spaces. Arranging the elements and TADAH, the completed first page  Kaiser Script and Versa "Bark" - the right concoction to create the overall aged paper look. (:
Stay tuned for the second art journal page! It's going to be an Art Journal! Dina Wakley "an art journal is a journal in which you combine art and words to express yourself. That's it, It's not complex and there really arent any rules for art journalling. It's all about self expression" I've scoured the web for some great art journal links to get us started. 1) Dina Wakley: Defining Art Journalling Aisling d'art: How to create and keep an art journal 2) Eva Johnson: Art Journal Inspirations (you can purchase one here) Images below are from Eva Johnson. 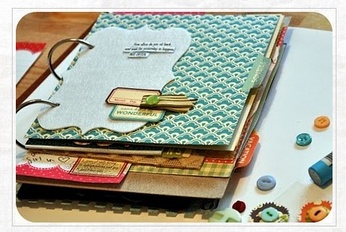 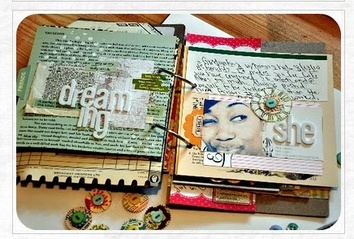 6 great tips by The Visual Journal: Tip #1: Get yourself a sketchbook Any unlined beautiful/ common sketchbook, or as gathered from the pictures here by Eva Johnson, any scraps of paper will do! Personally i think it's best to get acid-free papers that are slightly "weighty" so that they can better sustain the collages, alternatively we can always apply gesso to make the papers firmer. It's your choice, really. Tip #2: "Break the Tyranny of the first page" The Visual Journal "The first page is sometimes the hardest to get past. To break in a new, pristine book takes some doing" How apt! I don't know for you, but it's always hard for me. The suggestion given by the Visual Journal is to leave the first few pages blank". Guess it will be a better idea to start with random scraps of paper and later bind them up. Tip #3: Find the things you love and put them in! I cant emphasis enough that it's your art journal, do whatever! Tip #4: Jot down ideas when they come to mind Dont wait to do this! "fleeting inspirations are easily forgotten" Spot On. So, lets keep a teeny weeny sketchbook with us always! Tip #5: Take cuttings from magazines Couldnt agree more! I started out doing collages and fitting them to make book sleeves and there it goes - when Collage Scraps first started out, the primary business is in customising collages and fitting them to make book sleeves. Magazines are really good sources for inspirations too! Tip #6: Use quotes and other inspirational texts Particularly ones which stirred the heart, motivate you or give you positive happy thoughts! Lyrics, poems, the list goes on and on!  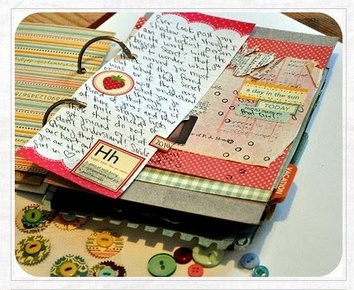 Ready for the visual journey?
|
